We all know the joy of cruising around on our bikes, feeling the wind in our hair, and the thrill of the open road. But have you ever wondered if your tires are correctly inflated?
Maintaining the correct tire pressure is crucial for a smooth and comfortable ride and ensures your safety on the road.
So, if you’re wondering how to check the tire pressure on your trusty cruiser bike, worry not! In this article, we will guide you through the simple steps to ensure your tires are always in top condition for your next adventure.
Table of Contents
Types of Tire Pressure Gauges
Digital Tire Pressure Gauge
The digital tire pressure gauge is a modern and convenient tool for checking tire pressure. It features an LCD screen that displays the tire pressure measurement in a clear and easy-to-read format. This type of gauge is battery-operated and typically provides accurate readings. It is also lightweight and portable, making it an excellent option for on-the-go use. Digital tire pressure gauges often come with additional features like automatic shutoff and built-in LED lights for convenience.
Pencil-Type Tire Pressure Gauge
The pencil-type tire pressure gauge, also known as a pencil gauge, is a simple yet effective tool for checking tire pressure. It is compact and can easily fit in your pocket or glove compartment. This type of gauge uses a sliding scale to measure the tire pressure. While pencil gauges are affordable and easy to use, they may not provide as accurate measurements as digital or dial gauges. However, they still serve as a reliable option for occasional tire pressure checks.
Dial Tire Pressure Gauge
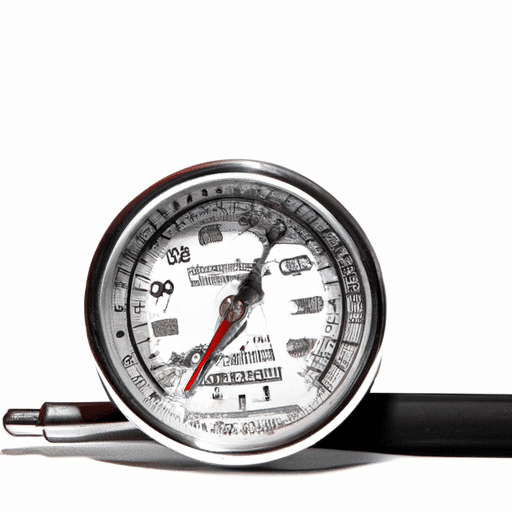
The dial tire pressure gauge features a round dial with a needle that indicates the tire pressure measurement. This type of gauge is easy to read and provides accurate readings. It often comes with a rubberized grip for comfortable handling. Automobile industry professionals commonly use dial gauges, but individuals can also use them for personal tire pressure checks. They are durable, reliable, and offer precise measurements, making them a popular choice among car and bike enthusiasts.
Stick Tire Pressure Gauge
The stick tire pressure gauge, also known as a stick or pocket gauge, is an essential and inexpensive tool for checking tire pressure. It consists of a measuring stick with markings that indicate the tire pressure. To use this gauge, you simply press it onto the tire valve and read the measurement on the stick. Stick gauges are compact and portable, making them easy to carry around. While they may not provide the same level of accuracy as digital or dial gauges, they are still a convenient option for quick tire pressure checks.
Identifying the Recommended Tire Pressure
Check the Manufacturer’s Guidelines
To identify the recommended tire pressure for your cruiser bike, it is essential to refer to the manufacturer’s guidelines. These guidelines can usually be found in the bike’s owner’s manual or on the manufacturer’s website. The recommended tire pressure may vary depending on the rider’s weight, riding conditions, and tire size. Following the manufacturer’s guidelines ensures that you maintain the optimal tire pressure for your cruiser bike, promoting safety and performance.
Look for Tire Pressure Information on the Tire Wall
Another way to identify the recommended tire pressure is by looking for tire pressure information on the tire wall. Many tires have markings or labels that indicate the maximum recommended tire pressure. These markings may be in the form of psi (pounds per square inch) or bar. It is important to note that the maximum recommended tire pressure may differ from the recommended tire pressure for optimal performance. Following the manufacturer’s guidelines for the most accurate tire pressure recommendation is always best.
Locating the Tire Valve
Understand the Different Valve Types
Before checking the tire pressure, it is essential to understand the different valve types used on cruiser bike tires. The two most common valve types are Schrader valves and Presta valves. Schrader valves are the same type of valve used on car tires and can be easily identified by their sturdy construction and valve cap that resembles a small button. On the other hand, Presta valves are thinner and longer, with a small nut at the top. It is crucial to know which type of valve your cruiser bike has to ensure compatibility with the tire pressure gauge.
Identifying the Valve Location on the Wheel
The valve location on the wheel may vary depending on the design of your cruiser bike. In most cases, the valve can be found on the wheel’s outer edge, facing outwards or towards the bike frame. It is essential to locate the valve before attempting to check the tire pressure to ensure accurate measurements. Before proceeding with the tire pressure check, take a moment to familiarize yourself with the valve’s location and position.
Using a Tire Pressure Gauge
Remove the Valve Cap
Before using a tire pressure gauge, it is necessary to remove the valve cap from the tire valve. The valve cap helps to prevent dust and debris from entering the valve and causing damage. Simply unscrew the cap in a counterclockwise direction and set it aside in a safe place. Be sure to keep the valve cap somewhere easily accessible to avoid misplacing it during the tire pressure check.
Press the Gauge onto the Valve
Once the valve cap has been removed, it is time to use the tire pressure gauge. Align the gauge with the valve and press it firmly onto the valve stem. You may hear a slight hissing sound as the gauge makes a proper seal with the valve. This is normal and indicates that the gauge accurately measures the tire pressure. Ensure that the gauge is securely attached to the valve before proceeding to the next step.
Read and Record the Pressure
After attaching the tire pressure gauge to the valve will display the current tire pressure measurement. Look at the gauge or the digital screen to read the tire pressure in psi or bar, depending on the gauge type. Please take note of the measurement and record it for future reference. It is essential to record the tire pressure to monitor any changes over time and ensure that the tires are properly inflated.
Checking the Tire Pressure
Prepare the Bike for Measurement
Before checking the tire pressure, it is essential to prepare the bike by standing it upright on a level surface. This allows for accurate tire pressure measurements as the bike’s weight is evenly distributed. Ensure the cruiser bike is stable and not leaning on any objects that may interfere with the tire pressure check. Additionally, ensure the tires are cold as tire pressure increases with heat. For the most accurate results, check the tire pressure when the bike has not been ridden for at least two hours.
Perform the Pressure Check
To check the tire pressure, follow the steps mentioned earlier in the “Using a Tire Pressure Gauge” section. Select the appropriate tire pressure gauge for your cruiser bike and, using the recommended technique, attach it to the valve stem. Once the gauge is securely attached, read the tire pressure measurement and record it. Repeat the process for each tire on the bike, as the front and rear tires may have different recommended tire pressures. By consistently checking the tire pressure, you can ensure that your cruiser bike is safe and performing optimally.
Inflating or Deflating the Tires
Inflate the Tires
If the tire pressure is lower than the recommended level, it is necessary to inflate the tires. To inflate the tires on your cruiser bike, you will need a bicycle pump or an air compressor with a suitable valve attachment. Attach the pump or compressor to the valve firmly to ensure a good seal. Gradually inflate the tires while periodically checking the tire pressure using a gauge. Take care not to overinflate the tires, as this can lead to reduced traction and increased risk of a blowout. Inflate the tires to the recommended tire pressure specified by the manufacturer or as indicated on the tire wall.
Deflate the Tires
If the tire pressure is higher than the recommended level, it is important to deflate the tires. To deflate the tires on your cruiser bike, gently press the valve stem with a blunt object, such as the tip of a pen or a small tool designed for valve deflation. Press the valve stem until there is a noticeable release of air.
Check the tire pressure periodically using a tire pressure gauge to ensure that the desired pressure is achieved. Take caution not to deflate the tires too much, as this can lead to poor handling and increased risk of a flat tire. Adjust the tire pressure to the recommended level specified by the manufacturer or as indicated on the tire wall.
Maintaining the Correct Tire Pressure
Check the Tire Pressure Regularly
To ensure optimal performance and safety, checking the tire pressure regularly is essential. Tire pressure can fluctuate due to a variety of factors such as temperature changes, riding conditions, and tire wear.
As a general rule, it is recommended to check the tire pressure at least once a month, or before and after long rides. Regularly monitoring the tire pressure allows you to identify any deviations from the recommended levels and make necessary adjustments.
Consider External Factors
When maintaining the correct tire pressure, it is essential to consider external factors that can affect tire performance. Factors such as temperature, load, and riding conditions can impact tire pressure.
For example, higher temperatures can cause tire pressure to increase, while colder temperatures can cause it to decrease. Similarly, heavier loads or rough terrains may require higher tire pressure for optimal performance. Considering these external factors, you can ensure your cruiser bike’s tires are correctly inflated for safe and comfortable rides.
Adjusting the Tire Pressure
If you find that the tire pressure has deviated from the recommended levels, it is essential to adjust the tire pressure accordingly. Refer to the manufacturer’s guidelines or the tire wall markings for the recommended tire pressure range. Inflate or deflate the tires as necessary to reach the desired pressure.
Making incremental adjustments and checking the tire pressure using a gauge is crucial to avoid overinflating or underinflating the tires. By maintaining the correct tire pressure, you can optimize the performance, handling, and lifespan of your cruiser bike’s tires.
Common Mistakes to Avoid
Not Using a Gauge
One common mistake to avoid is not using a tire pressure gauge. Visual inspection alone is not sufficient to accurately assess tire pressure. Tires can appear properly inflated when, in reality, they are underinflated or overinflated. Using a tire pressure gauge ensures accurate measurements and helps maintain the optimal tire pressure for your cruiser bike.
Ignoring Manufacturer Recommendations
It is essential to follow the manufacturer’s recommendations for tire pressure. These recommendations are specific to your cruiser bike model and consider weight distribution, riding conditions, and tire specifications. Ignoring these recommendations can compromise safety, performance, and tire lifespan.
Relying on Visual Inspection Only
Relying solely on visual inspection to determine tire pressure is not reliable. Tires may appear properly inflated at a glance, but they could be underinflated, affecting ride quality and safety. Always use a tire pressure gauge for accurate measurements and ensure the tire pressure is within the recommended range.
Critical Benefits of Proper Tire Pressure
Enhanced Ride Quality
Maintaining the proper tire pressure on your cruiser bike can significantly enhance ride quality. Underinflated tires can make the bike feel sluggish and reduce maneuverability. Overinflated tires can result in a harsh and uncomfortable ride. You can enjoy a smooth and comfortable riding experience by keeping the tires at the recommended pressure.
Improved Traction and Control
Proper tire pressure plays a crucial role in traction and control. Underinflated tires have reduced contact with the road surface, leading to decreased traction and compromised control. Overinflated tires, on the other hand, have a smaller footprint, which can also affect traction and handling. Maintaining the correct tire pressure ensures optimal grip and control, especially in various riding conditions.
Extend Tire Lifespan
Properly inflated tires have a longer lifespan compared to underinflated or overinflated tires. Underinflated tires can wear out the tread quickly, leading to premature replacement. Overinflated tires are more prone to damage and increased wear in the center of the tread. By maintaining the recommended tire pressure, you can extend the lifespan of your cruiser bike’s tires, saving you money in the long run.
Conclusion
Checking and maintaining the correct tire pressure on your cruiser bike is essential for safety and performance. By understanding the different types of tire pressure gauges, locating the tire valve, and using the proper techniques, you can ensure accurate tire pressure measurements.
Regularly checking tire pressure, adjusting as needed, and avoiding common mistakes will help maintain a smooth ride, improve traction, and extend tire lifespan. Take the time to care for your cruiser bike’s tires properly, and you’ll enjoy many safe and enjoyable rides ahead.


